Revision Notes on Practical Geometry
Line segment
A line segment is a part of a line with two endpoints.

A line perpendicular to a line segment
Any line which is perpendicular to a line segment makes an angle of 90°.

Construction of a line parallel to a given line, through a point not on the line
We need to construct it using ruler and compass only.
Step 1: Draw a line PQ and take a point R outside it.
Step 2: Take a point J on the line PQ and join it with R.
Step 3: Take J as a centre and draw an arc with any radius which cuts PQ at C and JR at B.
Step 4: Now with the same radius, draw an arc taking R as a centre.
Step 5: Take the measurement of BC with compass and mark an arc of the same measurement from R to cut the arc at S.
Step 6: Now join RS to make a line parallel to PR.

∠ARS = ∠BJC, hence RS ∥ PQ because of equal corresponding angles.
This concept is based on the fact that a transversal between two parallel lines creates a pair of equal corresponding angles.
Remark: This can be done by taking alternate interior angles instead of corresponding angles.
Construction of triangles
The construction of triangles is based on the rules of congruent triangles. A triangle can be drawn if-
-
Three sides are given (SSS criterion).
-
Two sides and an included angle are given (SAS criterion).
-
Two angles and an included side are given. (ASA criterion).
-
A hypotenuse and a side are given for right angle triangle (RHS criterion).
Construction of a triangle with three given sides (SSS criterion)
Example
Draw a triangle ABC with the sides AB = 6 cm, BC = 5 cm and AC = 9 cm.
Solution
Step 1: First of all draw a rough sketch of a triangle, so that we can understand how to go ahead.

Step 2: Draw a line segment AB = 6 cm.

Step 3: From point A, C is 9 cm away so take A as a centre and draw an arc of 9 cm.

Step 4: From point B, C is 5 cm away so take B as centre and draw an arc of 5 cm in such a way that both the arcs intersect with each other.

Step 5: This point of intersection of arcs is the required point C. Now join AC and BC.

ABC is the required triangle.
Construction of a triangle if two sides and one included angle is given (SAS criterion)
Example
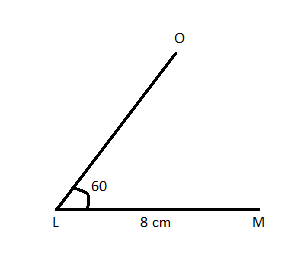
Construct a triangle LMN with LM = 8 am, LN = 5 cm and ∠NLM = 60°.
Solution
Step 1: Draw a rough sketch of the triangle according to the given information.

Step 2: Draw a line segment LM = 8 cm.

Step 3: draw an angle of 60° at L and make a line LO.

Step 4: Take L as a centre and draw an arc of 5 cm on LO.

Step 5: Now join NM to make a required triangle LMN.

Construction of a triangle if two angles and one included side is given (ASA criterion)
Example
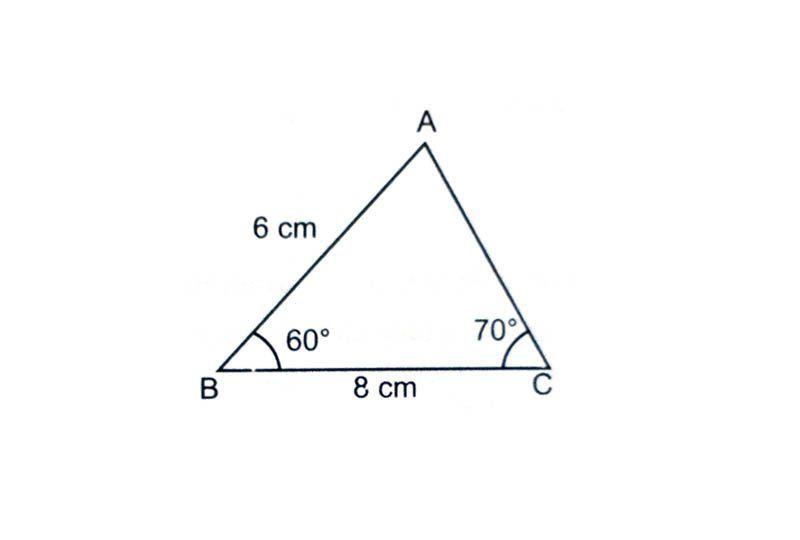
Draw a triangle ABC if BC = 8 cm, ∠B = 60°and ∠C = 70°.
Solution
Step 1: Draw a rough sketch of the triangle.

Step 2: Draw a line segment BC = 8 cm.

Step 3: Take B as a centre and make an angle of 60° with BC and join BP.

Step 4: Now take C as a centre and draw an angle of 70° using a protractor and join CQ. The point where BP and QC intersects is the required vertex A of the triangle ABC.

ABC is the required triangle ABC.
Construction of a right angle triangle if the length of the hypotenuse and one side is given (RHScriterion)
Example
Draw a triangle PQR which is right angled at P, with QR =7 cm and PQ = 4.5 cm.
Solution
Step 1: Draw a rough sketch of the triangle.

Step 2: Draw a line segment PQ = 4.5 cm.

Step 3: At P, draw PS ⊥ PQ. This shows that R must be somewhere on this perpendicular.

Step 4: Take Q as a centre and draw an arc of 7 cm which intersects PS at R.

PQR is the required triangle.