

Grade 11Mechanics
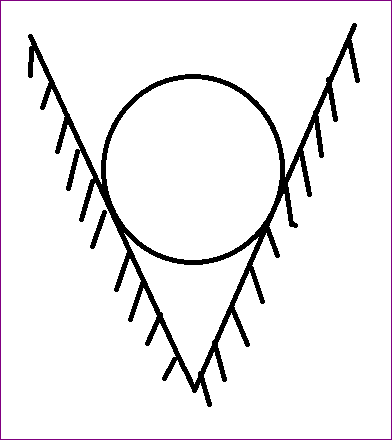
can i have a free body diagram of the above imagePLLLLLLLLLLLLLLLLZZZZZZZZZZ...... its urgent
can i have a free body diagram of the above image
PLLLLLLLLLLLLLLLLZZZZZZZZZZ...... its urgent


 Approved Tutor Answer1 Year ago
It seems like you're looking for a free body diagram, but I can't see the image you're referring to. However, I can guide you on how to create a free body diagram and explain its significance in physics. A free body diagram is a visual representation used to show all the forces acting on an object. This tool is essential for solving problems related to mechanics, as it helps in analyzing the forces and their effects on the object's motion.
To draw a free body diagram, follow these steps:
Let’s say we have a box resting on a flat surface. Here’s how you would create a free body diagram for this scenario:
Free body diagrams are crucial for understanding how forces interact with objects. They help in:
By mastering the creation of free body diagrams, you’ll enhance your problem-solving skills in physics significantly. If you have a specific scenario or forces in mind, feel free to describe it, and I can help you visualize that particular free body diagram!

Three identical balls are placed on a frictionless
horizontal surface touching each other. They stick to
each other because of adhesive. Another ball of same
radius and mass m is placed over the void created by
the three balls. Find the forces applied by the balls
kept on the floor to each other if the system remains
in equilibrium.
Last Activity: 10 Months ago
A car loaded with water having total mass 1000 kg moves on a straight horizontal Road starting from rest under the action of a force of 100 Newton. The water spills throw a small hole in the bottom at a rate of 0.1 KG per second the velocity of cart after 300 seconds is nearly.
11
21
31
41
Last Activity: 10 Months ago
Last Activity: 3 Years ago
Last Activity: 3 Years ago